Are you ready to enter that pile of Guest Cards, Decision Cards and Interest Forms into Fellowship One? This document describes the best methods of doing just that and who is involved. We refer to a Data Entry team in this document. Some churches may have a dedicated team of people that only do data entry. If so, this document is for you. If not, no problem. The various Champion Team Members for each department will most likely be performing those duties. If you don’t know what a Champion Team Member is then read our best practice document entitled Effectively Managing Fellowship One to get informed.
Before you can enter data from a Guest Card, Decision Card or other information form, you must model it as a contact form using the Model the Form best practice document.
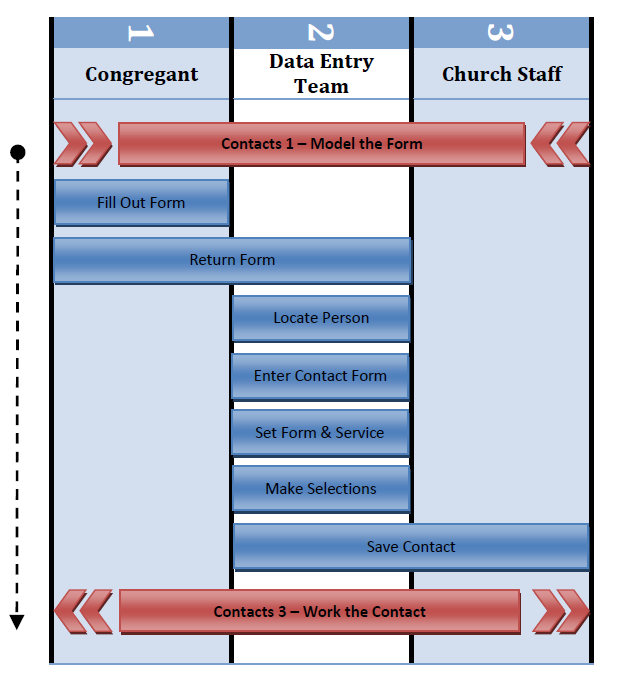
The church congregation fills out the form during services and activities and then turns it in for follow up. It is important to understand that there are several types of contact cards. Any form that is filled out can be treated as a contact card. For example, the youth ministry is using a registration form for a local mission trip. Once the form is filled out and turned in, the youth ministry wants to call and talk to all of the parents of the kids signing up. The form becomes a contact card and gets processed in the same way that a first time visitor card gets processed. The difference is that the items being selected will change. For more information on this please refer to the Model the Form document.
Once the forms are turned into the church, they are then forwarded to the data entry team for processing. It is recommended that there is one data entry team at any church but that is not always possible. If each ministry is responsible for processing their own communication cards then there should be some oversight by a Champion Team Leader or a Data Integrity Team Leader. This will allow for a uniform approach to data entry ensuring consistent results and a more accurate database.
The data entry team will enter the information on the forms within the People Tab. Start by searching for the desired person to avoid the creation of duplicate records. The search can be done either in the upper left search field or the search field show in the picture below. The team can split the forms up if there is more than one person processing the cards. The time between completion of the forms and data entry needs to be minimal. Church staff cannot respond to information requests nor contact first time guests until the cards have been processed.
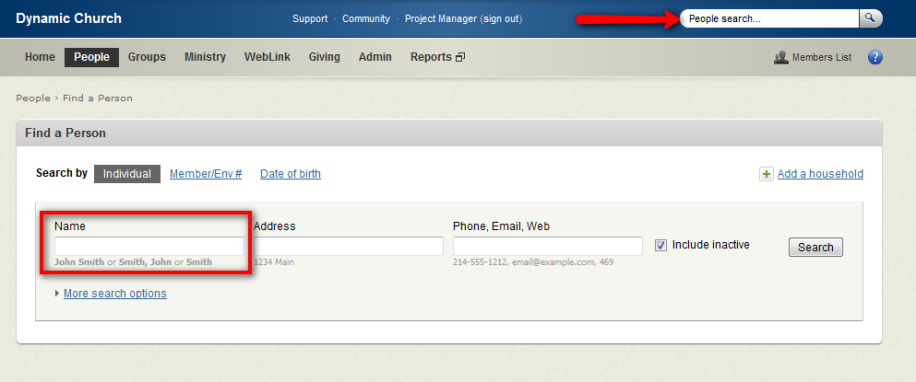
The data team will search for the name, address, or communication (phone number, email, etc.) on the form and then click on the desired person. Trying different combinations of names can yield better results. For example, if the name on the card is Bob try searching for Robert also. Searching by partial name instead of the whole name will produce better results. This helps make sure that an existing name is not overlooked due to a typing error. This also helps avoid creating duplicates in the database and helps validate data integrity. If you are searching for an address, only type in the house number and maybe a letter or two of the street name.
If no results return, the data entry team should press the  button and then input the information off of the communication card.
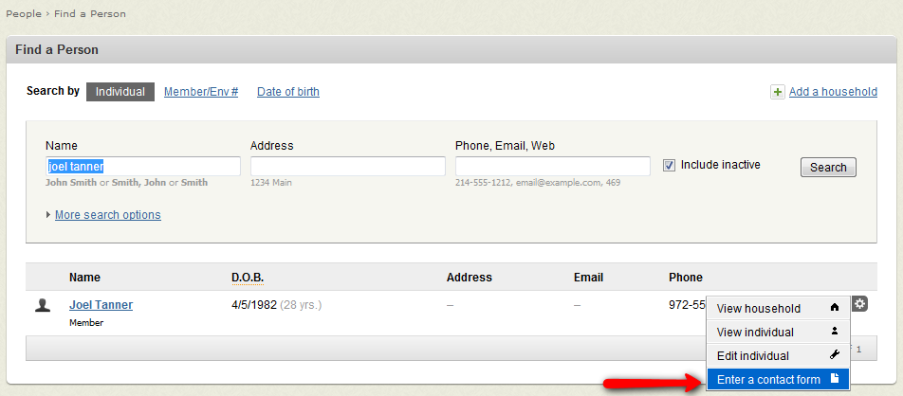
When either the record is located using the people search or by entering in a new household select the gear near the selected person’s name and then select Enter a contact form.
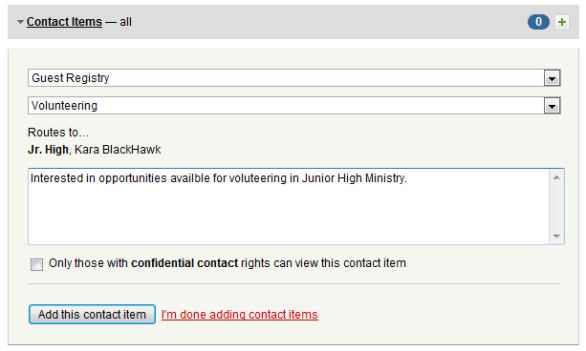
Contact items can also be immediately added on the individual view by clicking the  in the Contact Items section. You are limited to selecting only one contact item at a time. Below is an example of using this feature to create a contact item for Staff Follow Up. Each staff member could have a contact item directly assigned to them for quick follow-up assignments resulting from phone calls, etc.
Upon entering contact forms the first time each day, the data entry team will select the correct contact form title and associated service (if needed). The last one used is automatically displayed again and may not be correct. Service times show the specific service during which the card was collected. Service times also help avoid multi-campus confusion because the name of the activity is shown before the service time.
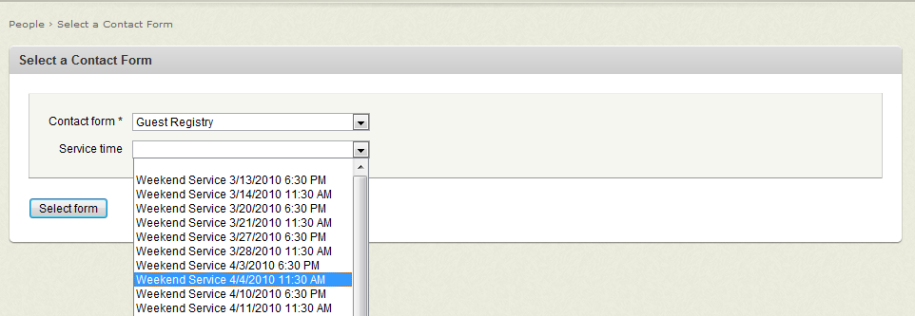
Click the Change Form link to switch to a different service or a different contact form altogether. If a desired form title is not showing up, then work needs to be done by the Champion Team Leader to make sure the contact forms are defined properly.
There may be multiple contact items, individual attributes, and registration options presented to you for selection based on what was previously defined by the Champion Team Leader. Since items can be selected for either an Individual or Household, only contact items will be visible when viewing a Household. Attributes and Registrations only apply to Individuals.
If a single card contains items for both the household and a specific individual in the household, it can be done easily in one action. View the individual, make the selections, switch the view to the household, make more selections and then View Summary. All items will be created for both the person and the household at the same time.
Since the items listed on the paper card may not always exactly match the items defined in the Fellowship One, the data entry team should be well trained in what to select in all possible scenarios. That team must know the purpose for every item and when to choose them based on the information available on the filled out card.
Upon making all selections, view the summary to ensure accuracy before proceeding.
Nothing is created until the selections are saved by clicking the Save Contact button. Once clicked, the selections are created as contact items, individual attributes and participant assignments. All contact items are routed to the appropriate ministry and Fellowship One user account. No notification email is created but an entry is displayed in the My Tasks area on the Home main tab for each contact when the responsible user logs in the next time.
The data team continues the above steps until all forms have been entered and saved.
The next document in the series, Work the Contact, will guide you through the steps and the multiple ways in which contacts can be worked in Fellowship One. Each of these unique approaches to working contacts gives the church more flexibility to approach the assimilation process in a way that makes sense to them.